

How To Fade An Image In Photoshop

Fade an Epitome to Any Color Groundwork with Photoshop
Learn step-past-pace how to fade an image to black, white or any colour background with Photoshop! Perfect for adding space for text or to blend an image with a design.
In this tutorial, I show y'all how easy information technology is to fade an prototype into whatever background color with Photoshop. This is a great way to alloy an image into a larger blueprint, or for creating space to add text abreast your subject.
Nosotros'll start by creating a new document and placing an image into information technology. Then we'll choose an initial color for the background, and fade the paradigm into the color using a layer mask. Finally, I'll bear witness yous how to alter the background to any color you like, including how to cull a color directly from the epitome itself.
You tin can follow along with any recent version of Photoshop. Simply note that 1 of the steps uses a slope, and Adobe made changes to the gradients back in Photoshop 2020. So for best results with this tutorial, you'll desire to be using Photoshop 2020 or after. I'm using Photoshop 2021.
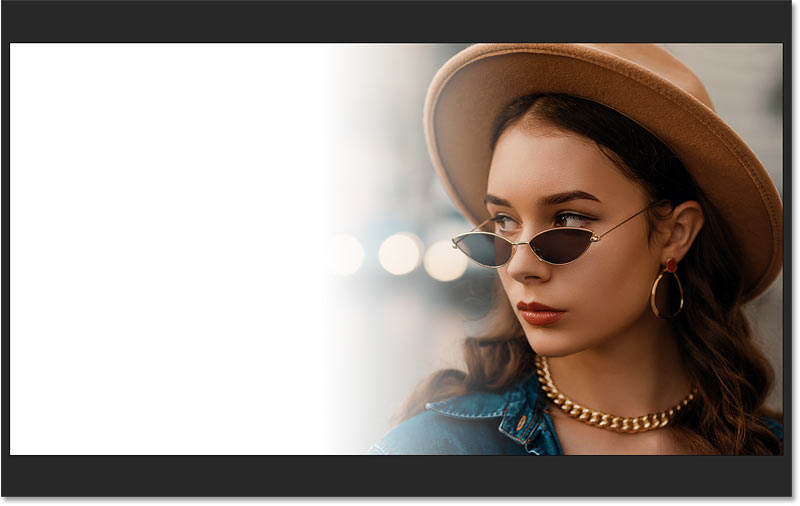
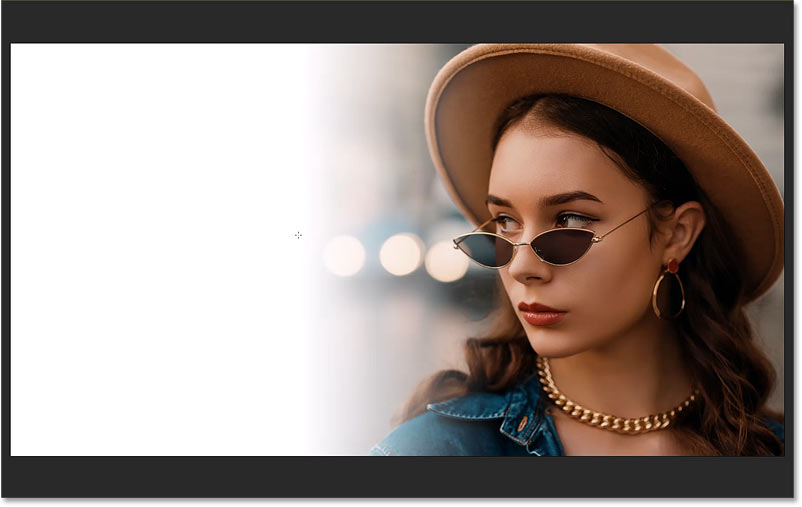
Here's an example of what the final upshot will look like:
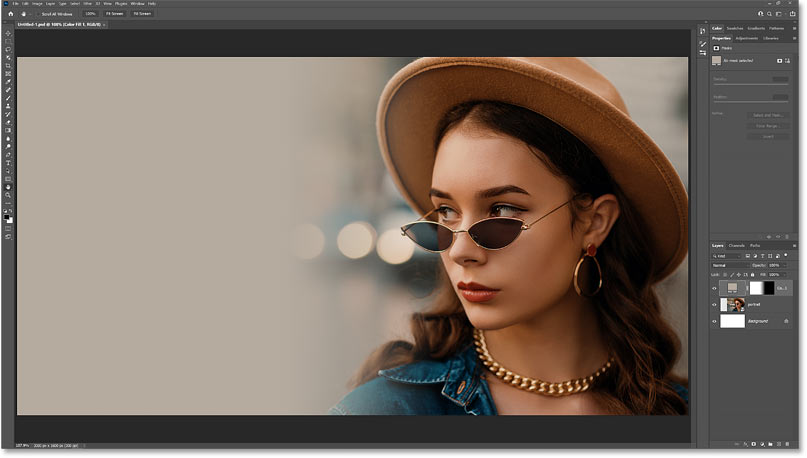
An prototype faded into a background color.
Let's go started!
Step 1: Create a new Photoshop document
Start by creating a new certificate. If you're on Photoshop's Home Screen, create a new certificate past clicking the Create new button
Clicking Create new
on the Home Screen.
Or if you're on the primary interface, become upward to the File carte du jour and choose New:
Going to File > New.
Then in the New Document dialog box, enter your settings. I'll set the Width to 3000 pixels, the Height to 1600 pixels, the Resolution to 300 pixels per inch and the Background Contents to White:
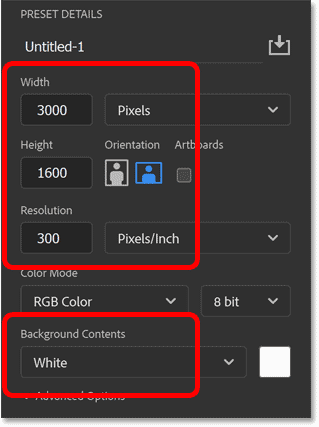
The new certificate settings.
Then create the new document by clicking the Create button:
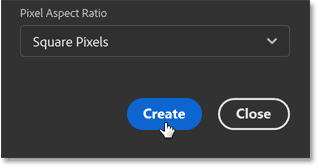
Clicking the Create push button.
Step two: Place your image into the document
Side by side, place your image into the document past going up to the File menu and choosing Place Embedded:
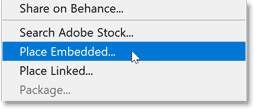
Going to File > Identify Embedded.
Navigate to the image on your estimator, click on the image to select it, and and then click Place:
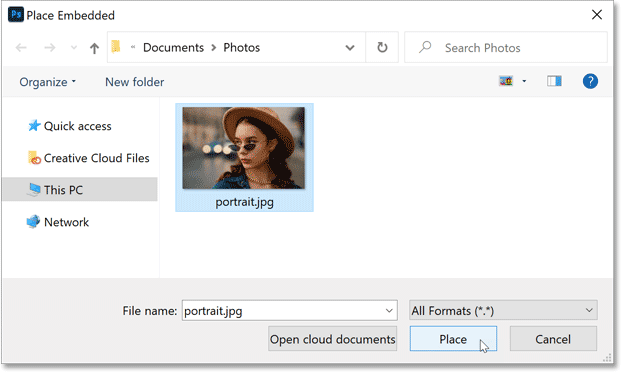
Choosing the image and clicking Place.
Related: Open up paradigm vs Place image in Photoshop
Photoshop places the epitome into the document, and it opens the Free Transform command so we can resize the image if needed and move it into place. If your image is larger than the certificate size, Photoshop will automatically resize it to fit, as it did here (fashion portrait from Adobe Stock):
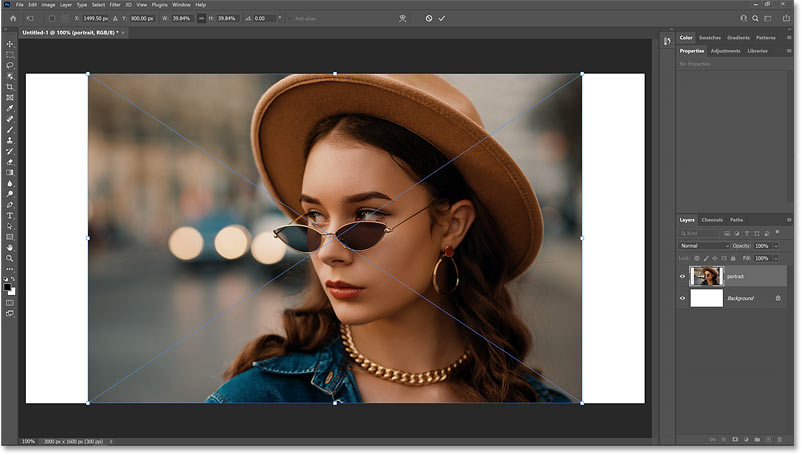
Free Transform opens automatically when placing an image into a document.
Footstep 3: Drag your discipline to one side of the document
To make more room for the paradigm to fade into the background, move your subject field over to the side by pressing and holding the Shift key on your keyboard and dragging the image left or right. Holding Shift limits the direction y'all can move, making information technology easier to drag straight beyond:
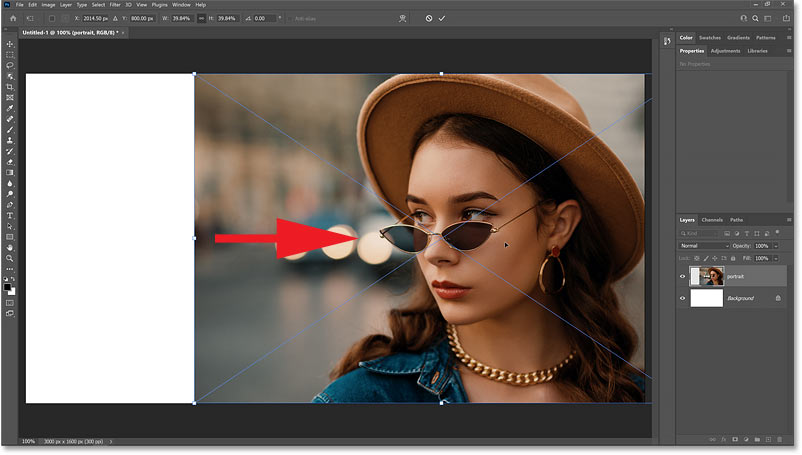
Dragging the subject to one side of the certificate.
When you're done, close Free Transform by clicking the cheque mark in the Options Bar:
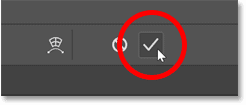
Clicking the bank check marking.
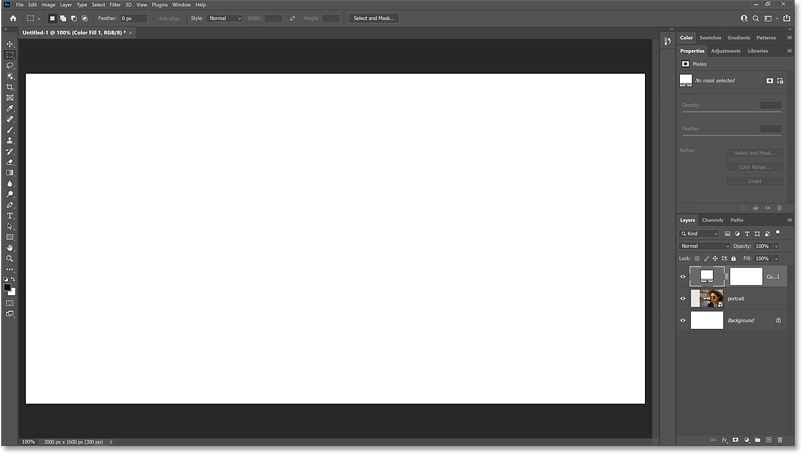
In the Layers console, we encounter that Photoshop placed the prototype on a new layer above the Background layer:
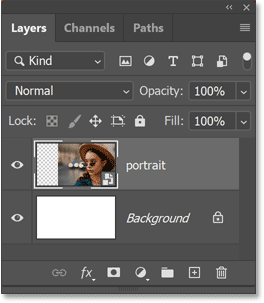
The image was placed on its own layer.
Related: How to open up multiple images as layers!
Footstep four: Add together a Solid Color fill layer
We're non actually going to use the Background layer for the background color. Instead, we'll use a Solid Color fill up layer which will brand information technology easier to choose whatever color we demand.
To add a Solid Color fill layer, start make sure your epitome layer is selected. Then click the New Fill or Adjustment Layer icon at the lesser of the Layers panel:
Clicking the New Fill or Adjustment Layer icon.
And choose Solid Color from the list:

Adding a Solid Color fill up layer.
Step 5: Choose an initial background colour
In the Color Picker, y'all tin can choose whatever color you like. Merely I'll choose white for at present past setting the R, G and B values to 255. We'll come back and change the color one time we've faded the paradigm into it.
Click OK when you're done to close the Color Picker:
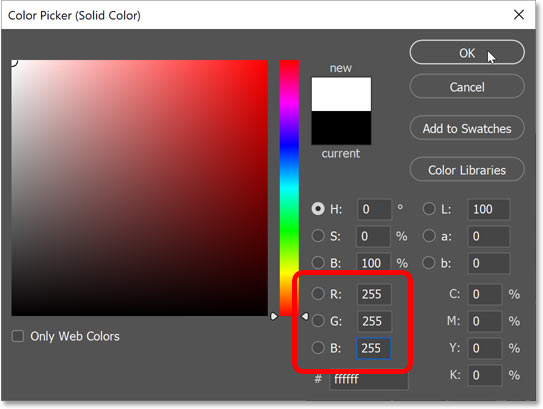
Choosing white every bit the starting groundwork color.
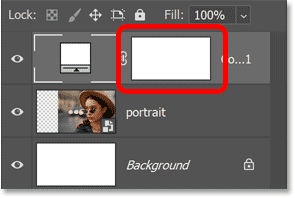
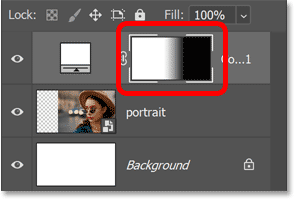
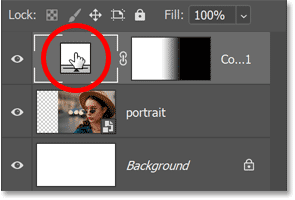
Back in the Layers panel, the fill layer was added above the image, which is why information technology'southward blocking the image from view:
The document is temporarily filled with white.
And notice that the fill up layer includes a congenital-in layer mask. We'll utilise this layer mask to fade the color into the image:
The layer mask thumbnail on the fill layer.
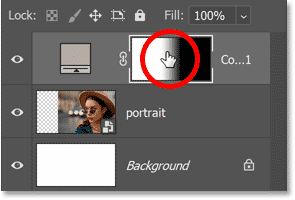
Footstep 6: Select the layer mask
At the moment, the fill up layer itself is selected, which we can tell past the white border around the colour swatch. We demand the layer mask to be selected, so click on the mask thumbnail:
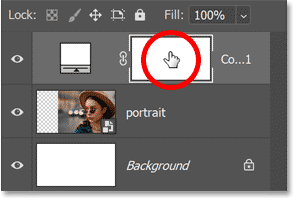
Selecting the layer mask.
Footstep 7: Select the Gradient Tool
To fade the color and the image together, we're going to draw a gradient on the mask. And for that, nosotros need the Gradient Tool.
Select the Gradient Tool from the toolbar:
Selecting the Gradient Tool.
Step 8: Choose the Black to White gradient
Then in the Options Bar, click on the arrow next to the gradient swatch:
Clicking the arrow to open the Gradient Picker.
In the Gradient Picker, twirl open the Basics binder (new as of Photoshop 2020) and choose the Black to White gradient past double-clicking on its thumbnail:

Double-clicking the Black to White slope thumbnail.
Footstep ix: Depict a black to white gradient on the layer mask
At present because we tin can't see the image nevertheless, we're not going to get things right on the first endeavour. But the idea is to elevate out a black to white slope beyond the layer mask in the expanse where we desire the epitome to fade into the color.
So set a starting point for the gradient by clicking and holding somewhere in the general area of where your subject appears. In my case, she's on the right:
Clicking and property with the Gradient Tool to fix the outset of the slope.
Then with your mouse button however held down, press and concord the Shift key on your keyboard and drag beyond the expanse where you want the image and the color to fade into each other. So this will be the transition expanse between the color and the image. Holding the Shift fundamental every bit you drag limits the bending of the gradient then it's easier to drag direct across:
Property Shift and dragging across the transition area betwixt the paradigm and the color.
Then to complete the gradient, release your mouse button, then release your Shift fundamental (in that order). And just similar that, the image is now fading into the color:
The epitome now fades into the color.
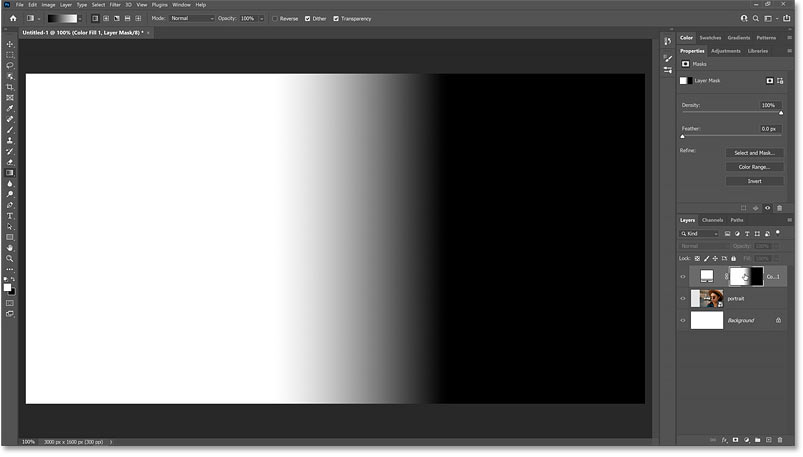
Viewing the gradient in the layer mask thumbnail
We can see the gradient by looking at the layer mask thumbnail in the Layers console. The black area of the mask is where the make full layer is 100 percent subconscious, assuasive the image below it to show through. The white expanse is where the fill layer is 100 percent visible and blocking the image from view. And the gradient in between is where they fade together:
The gradient appears in the layer mask thumbnail.
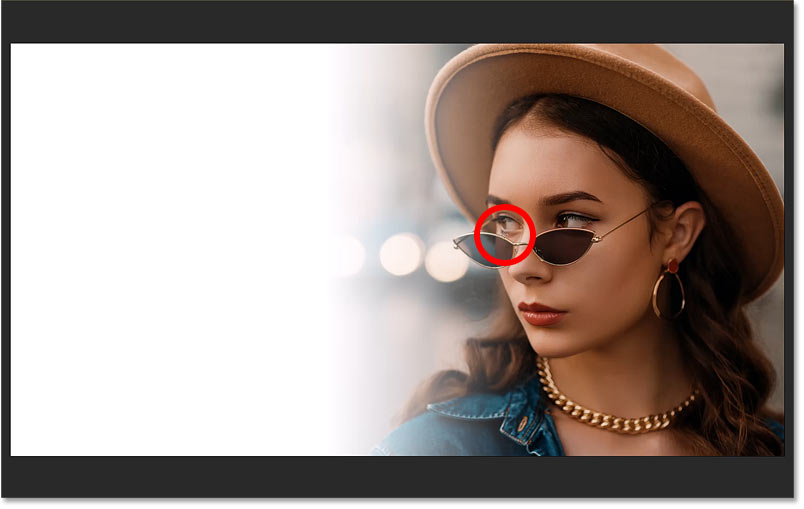
How to view the slope in the document
You tin can also view the layer mask in the document itself by holding the Alt (Win) / Option (Mac) key on a Mac, and clicking on the layer mask thumbnail:

Holding Alt (Win) / Option (Mac) and clicking the layer mask thumbnail.
And now it'due south easier to meet the black surface area where the image is showing through, the white where the color is visible, and the transition surface area between them:
Viewing the layer mask in the document.
Hold the Alt or Option key and click the layer mask thumbnail again to hide the mask:
Belongings Alt (Win) / Pick (Mac) and clicking again on the layer mask thumbnail.
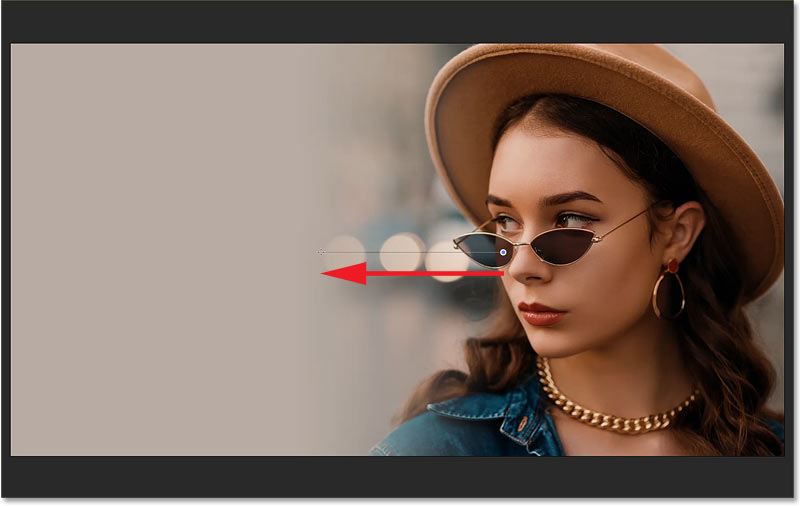
Step ten: Redraw the gradient to arrange the fade outcome
Now if you lot didn't draw the gradient in exactly the right spot, that's okay because you tin can just draw another one. In fact, you tin redraw the gradient every bit many times as yous need. Each new gradient you depict will supplant the previous i.
I'll click to set my starting point somewhere around the woman's eye:
Clicking to set the starting point of the second gradient.
Then with my mouse button still down, I'll hold the Shift key on my keyboard and I'll drag over to the left:
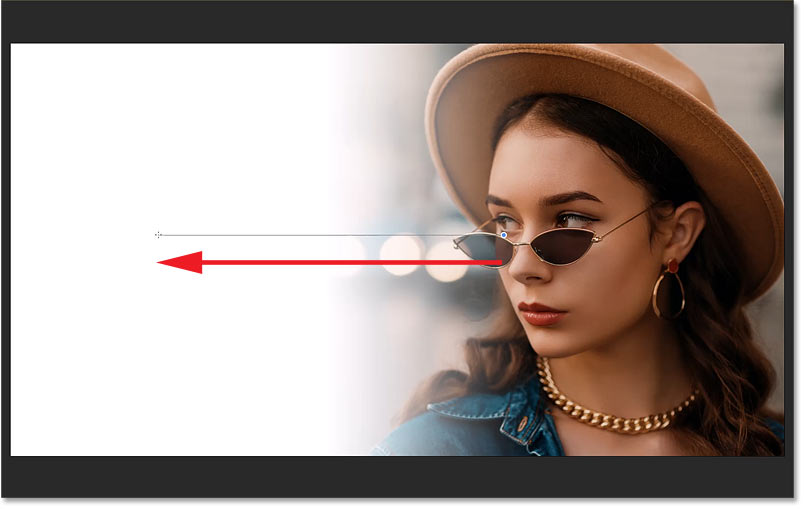
Holding Shift and dragging across the transition area.
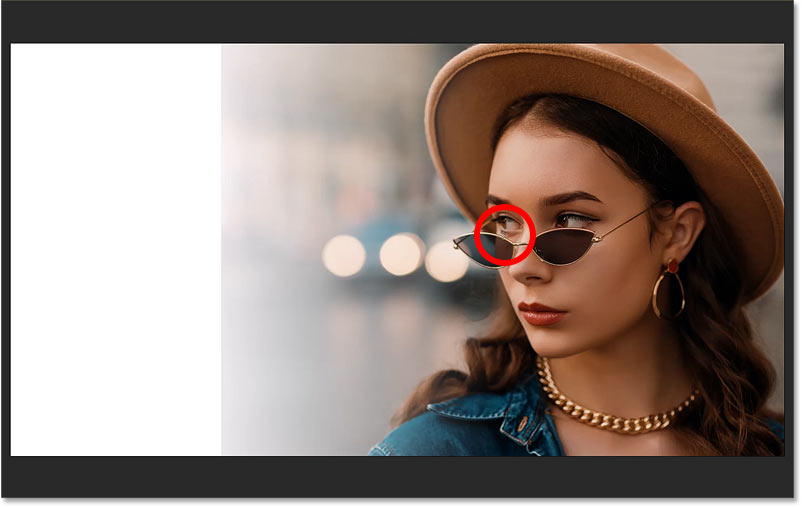
But notice when I release my mouse button that I went too far, and nosotros can run across the left edge of the image:

The left edge of the image is visible.
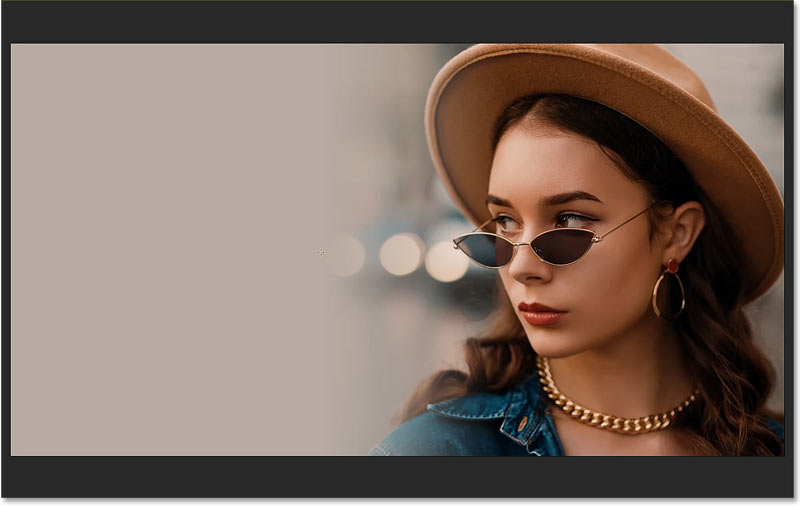
Then I'll try 1 more than time, starting in the same spot:
Clicking to set the starting betoken for the third endeavour.
Simply this time dragging a shorter altitude:

Dragging out a shorter transition area.
I'll release my mouse push button, then the Shift cardinal. And this looks improve:
A better result.
Stride 11: Choose a new fill layer color
Once you have the image fading into the color, you can change the color past double-clicking on the fill layer'due south color swatch in the Layers panel:
Double-clicking the fill layer's color swatch.
So either choose a new color from the Colour Picker:
Choosing a different color from the Color Picker.
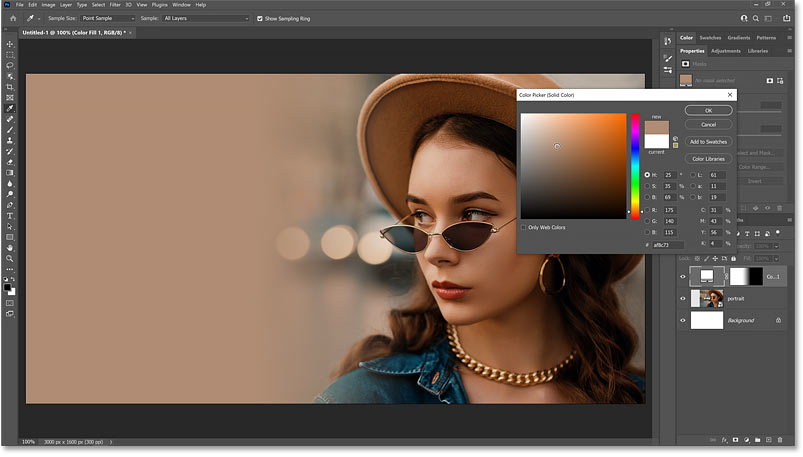
Or choose one straight from the paradigm. Merely motility your mouse cursor over the prototype and click on a color to sample it.
The Sample Size option
Just earlier y'all sample a colour, become up to the Options Bar and alter the Sample Size from Point Sample (the default setting) to something larger, like 3x3, 5x5 or 11x11. That way, you lot'll sample the boilerplate color of the area rather than the colour of an individual pixel. I'll cull 5x5:
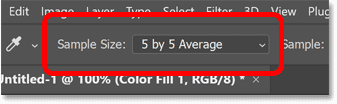
Choosing a larger Sample Size.
The Sample choice
Also, make certain the Sample choice is set to All Layers:

Making sure Sample is set up to All Layers.
Then click on dissimilar parts of the image to sample the colour until you find the ane that works all-time. I'll sample a grayish color from the upper correct. When you're washed, click OK to close the Colour Picker:
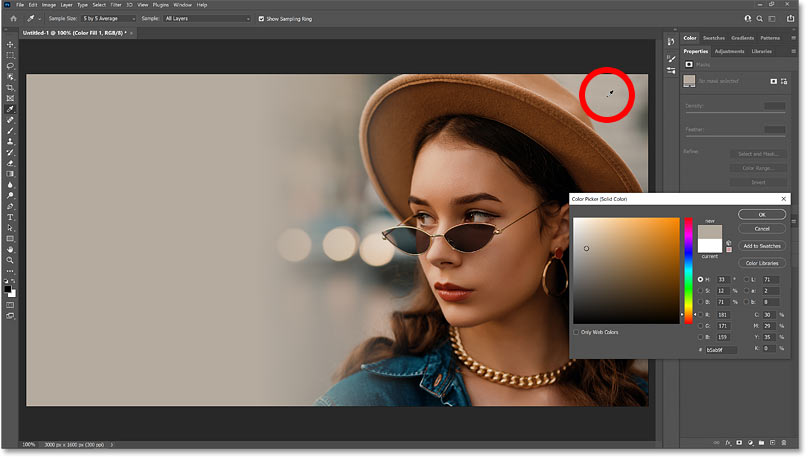
Clicking in the upper right of the paradigm to sample the colour.
Step 12: Redraw the gradient (optional)
Finally, if you want to go back and redraw the gradient, merely reselect the layer mask thumbnail in the Layers panel:
Reselecting the layer mask.
Then with the Gradient Tool still selected, click and hold on the starting point, hold Shift, and drag out the transition expanse:
Redrawing the gradient on the layer mask.
Release your mouse button, and then release the Shift key. And here is my last result:
The final effect.
Where to go next...
And there we have information technology! That's how to fade an image into whatever groundwork color with Photoshop!
For more ways to blend images together, cheque out my 3 Ways to Blend Ii Images tutorial. Or visit my Photo Furnishings department for more tutorials! And don't forget, all of my tutorials are available to download equally PDFs!
Other Stuff
© 2022 Photoshop Essentials.com.
For inspiration, non duplication.
Site design by Steve Patterson.
Photoshop is a trademark of Adobe Systems Inc.

How To Fade An Image In Photoshop,
Source: https://www.photoshopessentials.com/photo-effects/fade-an-image-into-any-background-color-with-photoshop/
Posted by: keelingeparequir.blogspot.com
0 Response to "How To Fade An Image In Photoshop"
Post a Comment